Pages

Showing posts with label cake. Show all posts

Baked Vegan and Gluten Free Cheesecake with Strawberry Glaze

It was Toby's birthday this weekend and when I discussed the idea of making him a cake he had zero interest in fact he said if I made a cake he won't eat any. We are such opposites in some ways. Until Lisa on twitter suggested a tofu cheesecake and he suddenly become interested. So I made him this protein packed cake:

Baked Vegan and Gluten Free Cheesecake with Strawberry Glaze

Base:
1 packet of gf biscuits- 175 grams, I used organ gluten free vanilla outback animal biscuit
60 grams dairy free margarine (nuttelex), melted

Place biscuits in food processor and process til they become crumbs, add melted margarine and press into base of 9 inch case pan. Place in fridge.

Cheesecake (from baking bites):
1-14 oz (390 grams) package firm silken tofu (I think the silken tofu I used was a little smaller)
1-8 oz (227grams) package Better than Cream Cheese
2/3 cup sugar
¼ cup lemon juice (I used tiny bit of lime juice since I didn't have enough lemon)
½ tsp almond essence (I used vanilla)
2 tbsp cornstarch

Preheat oven to 350F.

Place silken tofu and vegan cream cheese in the food processor. Process for 1 minute, then add sugar. Process until smooth and no sugar granules remain, 3-5 minutes.

In a small bowl, combine lemon juice and almond extract. Whisk in cornstarch. Pour mixture into the food processor and process until very smooth. Pour into prepared crust and bake for 45 minutes.
Allow to cool at room temperature for 2 hours, then refrigerate overnight.


Strawberry Glaze:
1/4 cup strawberry jam
2 tablespoon of water
1 punnet of strawberries (you made need more or less depending on how you want to decorate it)

Heat jam and water until simmering and brush on cake, add strawberries and glaze more on top. Chill until ready to eat.

I put the strawberries in the shape of a 'T' in the middle. This was a pretty easy cake to make, it does make a small cake though and it does have a slight soy flavour. Everyone seemed to enjoy it though particularly the birthday boy!

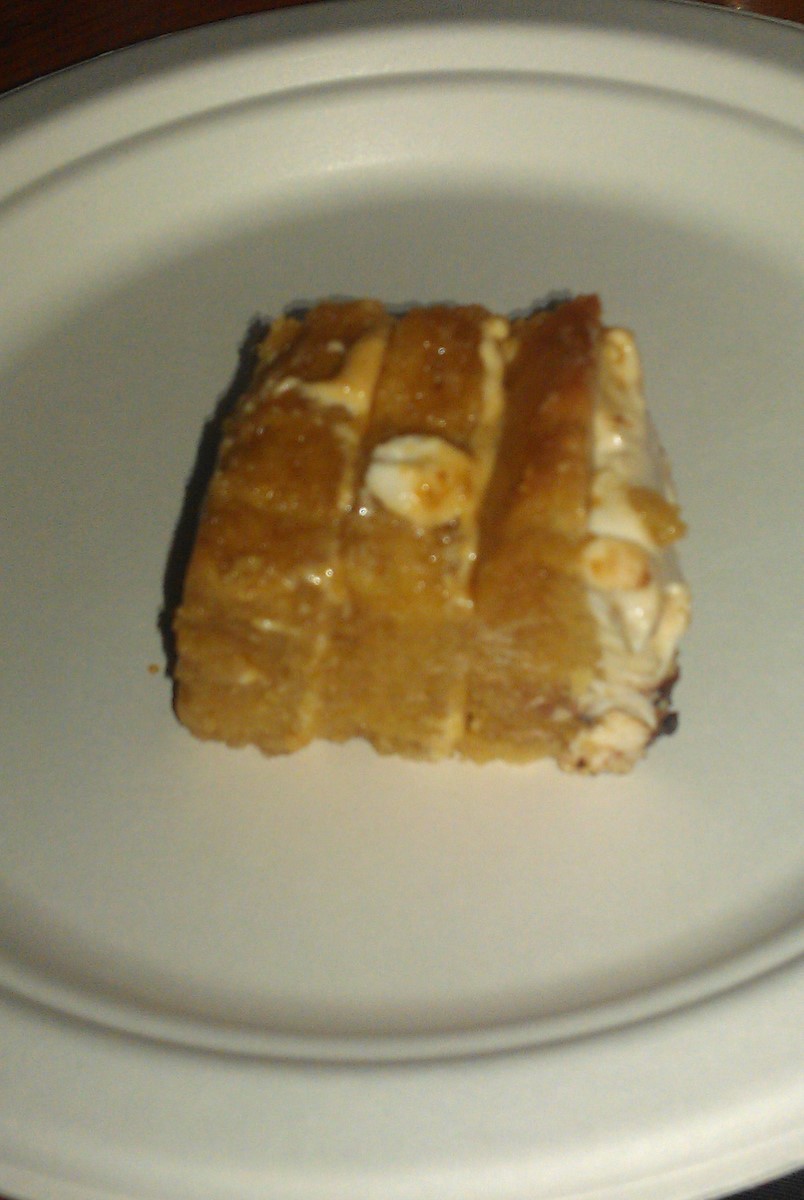
Here is a not so great phone pic:


P.S: Planet VegMel is celebrating its third birthday this year with a picnic on Saturday September 15 at Edinburgh Gardens, starting at 1pm.  Check out the facebook event here. Come along and bring some vegan food to share. If you are up for a challenge or just wanting to feed me you can make it gf too :-)
It was Toby's birthday this weekend and when I discussed the idea of making him a cake he had zero interest in fact he said if I made a cake he won't eat any. We are such opposites in some ways. Until Lisa on twitter suggested a tofu cheesecake and he suddenly become interested. So I made him this protein packed cake:

Baked Vegan and Gluten Free Cheesecake with Strawberry Glaze

Base:
1 packet of gf biscuits- 175 grams, I used organ gluten free vanilla outback animal biscuit
60 grams dairy free margarine (nuttelex), melted

Place biscuits in food processor and process til they become crumbs, add melted margarine and press into base of 9 inch case pan. Place in fridge.

Cheesecake (from baking bites):
1-14 oz (390 grams) package firm silken tofu (I think the silken tofu I used was a little smaller)
1-8 oz (227grams) package Better than Cream Cheese
2/3 cup sugar
¼ cup lemon juice (I used tiny bit of lime juice since I didn't have enough lemon)
½ tsp almond essence (I used vanilla)
2 tbsp cornstarch

Preheat oven to 350F.

Place silken tofu and vegan cream cheese in the food processor. Process for 1 minute, then add sugar. Process until smooth and no sugar granules remain, 3-5 minutes.

In a small bowl, combine lemon juice and almond extract. Whisk in cornstarch. Pour mixture into the food processor and process until very smooth. Pour into prepared crust and bake for 45 minutes.
Allow to cool at room temperature for 2 hours, then refrigerate overnight.


Strawberry Glaze:
1/4 cup strawberry jam
2 tablespoon of water
1 punnet of strawberries (you made need more or less depending on how you want to decorate it)

Heat jam and water until simmering and brush on cake, add strawberries and glaze more on top. Chill until ready to eat.

I put the strawberries in the shape of a 'T' in the middle. This was a pretty easy cake to make, it does make a small cake though and it does have a slight soy flavour. Everyone seemed to enjoy it though particularly the birthday boy!

Here is a not so great phone pic:


P.S: Planet VegMel is celebrating its third birthday this year with a picnic on Saturday September 15 at Edinburgh Gardens, starting at 1pm.  Check out the facebook event here. Come along and bring some vegan food to share. If you are up for a challenge or just wanting to feed me you can make it gf too :-)
reade more... Résuméabuiyad

Ginger Ripple Cake-Vegan Mofo Day 1

I'm a bit nervous about signing up for vegan mofo again. What have I gotten myself into it? It was quite tricky last year  when we blogged every day for a whole month but it did result in me being a bit more creative with meals and its all for a great reason, right? To celebrate a whole month of vegan food by writing about it as much as possible.


To kick start I want to share my dessert recipe which I made for the vegmel potluck, this is perhaps the laciest dessert that I have ever made but was still quite tasty I think.

It's a version of the great aussie chocolate ripple cake which is generally made from chocolate cookies called ripple biscuits and cream, like this. According to wikipedia there are similar versions in other countries  and it's called icebox cake in the US.

Ginger Ripple Cake adapted from Fat Fuelled Vegan's recipe
2 packets of Leda Gluten Free gingernut biscuits
2 packets of soyatoo topping cream
2 tablespoons of  Frangelico (optional)
roughly 1 cup of  frozenbluberries (optional)

Mix the frozen blueberries and frangelico into the cream, put a thin layer of cream on the bottom of bowl, then add a layer of biscuits, repeat until all the biscuits are finish and top with last layer of cream. Allow to sit for at least 2 hours so the biscuits soften. Done!

I would also halve this recipe unless you were making it for a large group of people. I altered two things to his original recipe, one I decided to add frozen blueberries to the cream and to the top and I used ready made vegan cream and a bit of left over alcohol and cream from the tiramisu. Next time I would probably leave out the blueberries, they just seemed kind of out of place and I don't think the frangelico really added anything to it flavour wise.

I decorated it with a V for  planet vegmel.
I'm a bit nervous about signing up for vegan mofo again. What have I gotten myself into it? It was quite tricky last year  when we blogged every day for a whole month but it did result in me being a bit more creative with meals and its all for a great reason, right? To celebrate a whole month of vegan food by writing about it as much as possible.


To kick start I want to share my dessert recipe which I made for the vegmel potluck, this is perhaps the laciest dessert that I have ever made but was still quite tasty I think.

It's a version of the great aussie chocolate ripple cake which is generally made from chocolate cookies called ripple biscuits and cream, like this. According to wikipedia there are similar versions in other countries  and it's called icebox cake in the US.

Ginger Ripple Cake adapted from Fat Fuelled Vegan's recipe
2 packets of Leda Gluten Free gingernut biscuits
2 packets of soyatoo topping cream
2 tablespoons of  Frangelico (optional)
roughly 1 cup of  frozenbluberries (optional)

Mix the frozen blueberries and frangelico into the cream, put a thin layer of cream on the bottom of bowl, then add a layer of biscuits, repeat until all the biscuits are finish and top with last layer of cream. Allow to sit for at least 2 hours so the biscuits soften. Done!

I would also halve this recipe unless you were making it for a large group of people. I altered two things to his original recipe, one I decided to add frozen blueberries to the cream and to the top and I used ready made vegan cream and a bit of left over alcohol and cream from the tiramisu. Next time I would probably leave out the blueberries, they just seemed kind of out of place and I don't think the frangelico really added anything to it flavour wise.

I decorated it with a V for  planet vegmel.
reade more... Résuméabuiyad

Vegan and Gluten Free Tiramisu

It was Toby's birthday last week so I made tiramisu because he is coffee crazy as you all know. I found this recipe on Green Vegan Living which was actually good timing because I had just received some Bob's Red Mill gluten free flour in the mail. This was my first time attempting tiramisu but I think it was pretty good. Toby certainly enjoyed it and that's the important part.


Vegan and Gluten Free Tiramisu from Green Vegan Living

Lady Fingers


2 cups Bob's Red Mill all-purpose baking flour
1 T. baking powder
pinch of salt
1/2 c. agave
1/2 c. maple syrup
2 T. canola oil
1/3 c. apple sauce
1 T. vanilla
3/4 c.soy milk

  1. Preheat the oven to 350. 
  2. Measure out all the dry ingredients in a large bowl. Create a small hallowed “bowl” in the center of the dry ingredients. Add the wet ingredients. Gradually incorporate the dry ingredients from around the outside of this hollowed bowl, until everything is evenly mixed in. 
  3. Using a rubber spatula, transfer into a greased glass baking dish (9" x 13") and place in the middle of the oven on the center rack. 
  4. Bake for 25 minutes. After baking, place on a cooling rack and loosen the edges. 
  5. After it has cooled for about 15 minutes flip the cake over onto a cutting board and cut into 1" x 3" pieces. 


"Cream" Geanna's recipe asked for yogurt but I borrowed the idea from insomanic chef and used vegan sour cream instead.


8 oz. vegan cream cheese 
1/4 c. vegan sour cream (instead of yogurt)
1/4 c. vegan cream
2 T. liquor/liqueur of choice (I copied her and Frangelico)
1/3 c. powdered sugar
2 t. vanilla extract
1/2 t. cornstarch 
1/2 t. xanthan gum

  1. Bring heavy cream to a boil in a small sauce pan and then dissolve the xanthan gum and cornstarch into it. Allow it to cool to room temperature. 
  2. Combine the thick cream mixture with all the other ingredients above and beat well. 
  3. Put the mix in the fridge to set for several hours.


Sauce


1 c. strong coffee
3 T. liquor/liqueur of choice  (I used kirsch)
3 T. agave nectar
Combine these ingredients and put in the fridge to cool.


Assembly


  1. Dip the lady fingers into the coffee sauce and let it soak up the moisture for a couple of seconds. 
  2. Layer these in the bottom of a glass trifle or baking dish until the entire base is covered. 
  3. Using a spatula, spread the "cream" evenly over the lady finger base. 
  4. Repeat steps 2 and 3 at least once more, depending on how big your dish is.
  5. Sprinkle unsweetened cocoa powder over the top, completely covering the top. Place in the refrigerator for at least an hour to let the flavors meld together.
It is quite time consuming to make, so I spread it out over two days by making the lady fingers on one weeknight  and the rest on a saturday. Next time I would spread it out even more as I didn't allow enough time for the lady fingers to soften and absorb the coffee before serving.  So instead of making it in advance Toby thought the coffee flavour was too subtle initially so we added more of the leftover coffee sauce to it which I think resulted in a slightly bitter flavour which I wasn't a big fan of but then I dislike coffee. We did have one tiny peice left on the sunday and it was defintely superior: softer cake and with a stronger flavour.

 I made a basic T stencil to decorate it.


Excuse this photo, I used a phone camera in a dark pub:
It was Toby's birthday last week so I made tiramisu because he is coffee crazy as you all know. I found this recipe on Green Vegan Living which was actually good timing because I had just received some Bob's Red Mill gluten free flour in the mail. This was my first time attempting tiramisu but I think it was pretty good. Toby certainly enjoyed it and that's the important part.


Vegan and Gluten Free Tiramisu from Green Vegan Living

Lady Fingers


2 cups Bob's Red Mill all-purpose baking flour
1 T. baking powder
pinch of salt
1/2 c. agave
1/2 c. maple syrup
2 T. canola oil
1/3 c. apple sauce
1 T. vanilla
3/4 c.soy milk

  1. Preheat the oven to 350. 
  2. Measure out all the dry ingredients in a large bowl. Create a small hallowed “bowl” in the center of the dry ingredients. Add the wet ingredients. Gradually incorporate the dry ingredients from around the outside of this hollowed bowl, until everything is evenly mixed in. 
  3. Using a rubber spatula, transfer into a greased glass baking dish (9" x 13") and place in the middle of the oven on the center rack. 
  4. Bake for 25 minutes. After baking, place on a cooling rack and loosen the edges. 
  5. After it has cooled for about 15 minutes flip the cake over onto a cutting board and cut into 1" x 3" pieces. 


"Cream" Geanna's recipe asked for yogurt but I borrowed the idea from insomanic chef and used vegan sour cream instead.


8 oz. vegan cream cheese 
1/4 c. vegan sour cream (instead of yogurt)
1/4 c. vegan cream
2 T. liquor/liqueur of choice (I copied her and Frangelico)
1/3 c. powdered sugar
2 t. vanilla extract
1/2 t. cornstarch 
1/2 t. xanthan gum

  1. Bring heavy cream to a boil in a small sauce pan and then dissolve the xanthan gum and cornstarch into it. Allow it to cool to room temperature. 
  2. Combine the thick cream mixture with all the other ingredients above and beat well. 
  3. Put the mix in the fridge to set for several hours.


Sauce


1 c. strong coffee
3 T. liquor/liqueur of choice  (I used kirsch)
3 T. agave nectar
Combine these ingredients and put in the fridge to cool.


Assembly


  1. Dip the lady fingers into the coffee sauce and let it soak up the moisture for a couple of seconds. 
  2. Layer these in the bottom of a glass trifle or baking dish until the entire base is covered. 
  3. Using a spatula, spread the "cream" evenly over the lady finger base. 
  4. Repeat steps 2 and 3 at least once more, depending on how big your dish is.
  5. Sprinkle unsweetened cocoa powder over the top, completely covering the top. Place in the refrigerator for at least an hour to let the flavors meld together.
It is quite time consuming to make, so I spread it out over two days by making the lady fingers on one weeknight  and the rest on a saturday. Next time I would spread it out even more as I didn't allow enough time for the lady fingers to soften and absorb the coffee before serving.  So instead of making it in advance Toby thought the coffee flavour was too subtle initially so we added more of the leftover coffee sauce to it which I think resulted in a slightly bitter flavour which I wasn't a big fan of but then I dislike coffee. We did have one tiny peice left on the sunday and it was defintely superior: softer cake and with a stronger flavour.

 I made a basic T stencil to decorate it.


Excuse this photo, I used a phone camera in a dark pub:
reade more... Résuméabuiyad

Vegan Gluten Free Blackforest Cake

It was Toby's birthday on Wednesday and to celebrate I made him a cake yesterday. At his request I made blackforest cake. I looked at about a dozen recipes for regular gluteny non-vegan blackforest cakes and combined several elements. I discovered that black forest cake is called black forest gateau and Schwarzwälder Kirschtorte in some parts of the world and most versions of blackforest cake are not really authentic and neither was mine. Traditionally black forest cake included a shortcrust pastry base and looked quite different. Although I did buy kirsch (cherry liquour) especially which hopefully scores me some point for authenticity. I even had to make a special trip to Dan murphies since coles and safeway liquor stores didn't sell it.

Instead of making the gluten free cake from scratch I purchased 2 packets of g/f most chocolate mud cake. I was hoping that they were big enough to cut into half so I could have four layers but unfortunately they weren't. I do love this cake mix though it's rich, moist although a tad oily. All I needed to do was add oil, water and egg replacer.

So here's the basic recipe:

  • 2 x deliciously free most chocolate mud cake plus required egg replacer and veg oil
  • Approximately 1/8 of a Dark Chocolate Block to make shavings
  • 1 can of soyatoo spray cream (I still have some leftover)

Ganache- I altered the recipe from here:
1 Cup Dark Vegan Chocolate
2 Tbsp. Margarine
1/3 Cup Soy Milk
1/4 teaspoon of Cinnamon

In the top of a double boiler, place the margarine and soy milk. Bring the water below to a very low simmer and whisk. Mix in the cinnamon. Add the chocolate. Once it looks like it is beginning to melt, whisk until smooth. Remove from the heat immediately. Allow mixture to cool.

Cherries mixture:
1 800gram jar of morello cherries (I didn't end up using all of the cherries but would next time)
1 teaspoon vanilla essence
1 tablespoon sugar
1 tablespoon corn starch
1/3 cup of Kirsch (or enough to cover cherries)

Drain cherries (reserving the syrup) and put aside. Heat cherry syrup with corn starch, sugar and vanilla essence. Pour kirsch over drained cherries while you slowly bring cherry syrup to boil. Once Mixture had reduced and thickened, drain kirsch from cherries and add them to heat for a minute. Allow mixture to cool. In hindsight, I could have allowed this to reduce further.


And the assembling of the cake:
I sprinkled a generous amount of kirsch on the first layer.
Put a layer of ganache on top:
Put the cherry mixture on top:
And then some soyatoo 'cream':
Put the other cake on top, sprinkle more kirsch and then add more ganache:

I then used the soyatoo cream to make a couples of rings around the side to keep in plenty of cherries on top. Looks wise I should have perhaps left it there but I couldn't help myself.
And sprinkled plenty of chocolate flakes on top:
And decided that I needed to add more ganache to the sides. I didn't have enough ganache though so I combined the ganache with soyawhip and then coated the sides. And because I went a little overboard with the chocolate flakes I decided to add more soyatoo and one cherry on top:


Here's a inside peak:

And the sign of a good cake, it was finished pretty quickly:
I thought maybe I added too much 'cream' but it's so mild you can barely taste it. I was pretty pleased with the taste and texture. In fact taste wise it's my favourite cake that I've made but next time I would add more kirsch and cherries and try to improve the cherry syrup.
It was Toby's birthday on Wednesday and to celebrate I made him a cake yesterday. At his request I made blackforest cake. I looked at about a dozen recipes for regular gluteny non-vegan blackforest cakes and combined several elements. I discovered that black forest cake is called black forest gateau and Schwarzwälder Kirschtorte in some parts of the world and most versions of blackforest cake are not really authentic and neither was mine. Traditionally black forest cake included a shortcrust pastry base and looked quite different. Although I did buy kirsch (cherry liquour) especially which hopefully scores me some point for authenticity. I even had to make a special trip to Dan murphies since coles and safeway liquor stores didn't sell it.

Instead of making the gluten free cake from scratch I purchased 2 packets of g/f most chocolate mud cake. I was hoping that they were big enough to cut into half so I could have four layers but unfortunately they weren't. I do love this cake mix though it's rich, moist although a tad oily. All I needed to do was add oil, water and egg replacer.

So here's the basic recipe:

  • 2 x deliciously free most chocolate mud cake plus required egg replacer and veg oil
  • Approximately 1/8 of a Dark Chocolate Block to make shavings
  • 1 can of soyatoo spray cream (I still have some leftover)

Ganache- I altered the recipe from here:
1 Cup Dark Vegan Chocolate
2 Tbsp. Margarine
1/3 Cup Soy Milk
1/4 teaspoon of Cinnamon

In the top of a double boiler, place the margarine and soy milk. Bring the water below to a very low simmer and whisk. Mix in the cinnamon. Add the chocolate. Once it looks like it is beginning to melt, whisk until smooth. Remove from the heat immediately. Allow mixture to cool.

Cherries mixture:
1 800gram jar of morello cherries (I didn't end up using all of the cherries but would next time)
1 teaspoon vanilla essence
1 tablespoon sugar
1 tablespoon corn starch
1/3 cup of Kirsch (or enough to cover cherries)

Drain cherries (reserving the syrup) and put aside. Heat cherry syrup with corn starch, sugar and vanilla essence. Pour kirsch over drained cherries while you slowly bring cherry syrup to boil. Once Mixture had reduced and thickened, drain kirsch from cherries and add them to heat for a minute. Allow mixture to cool. In hindsight, I could have allowed this to reduce further.


And the assembling of the cake:
I sprinkled a generous amount of kirsch on the first layer.
Put a layer of ganache on top:
Put the cherry mixture on top:
And then some soyatoo 'cream':
Put the other cake on top, sprinkle more kirsch and then add more ganache:

I then used the soyatoo cream to make a couples of rings around the side to keep in plenty of cherries on top. Looks wise I should have perhaps left it there but I couldn't help myself.
And sprinkled plenty of chocolate flakes on top:
And decided that I needed to add more ganache to the sides. I didn't have enough ganache though so I combined the ganache with soyawhip and then coated the sides. And because I went a little overboard with the chocolate flakes I decided to add more soyatoo and one cherry on top:


Here's a inside peak:

And the sign of a good cake, it was finished pretty quickly:
I thought maybe I added too much 'cream' but it's so mild you can barely taste it. I was pretty pleased with the taste and texture. In fact taste wise it's my favourite cake that I've made but next time I would add more kirsch and cherries and try to improve the cherry syrup.
reade more... Résuméabuiyad

Marshmallow mud cake

The night before the scrabble party there was another party, Lexi's birthday/Tara's farewell potluck party. A couple of weeks before I heard Lexi say that you wants to make the marshmallow mud cake from my sweet vegan but she can't because we can't get ricemellow cream here. So I decided to try to replicate it with the marshmallow making kit.

The kit had instructions for making marshmallow 'cream' or fluff. So I did that and was left with a quite firm jelly like texture, I followed the recipe in the book but added more 'cream' that it asked for and it come out great, both texture wise and taste wise. Although I later decided that maybe it wasn't marshmallowy enough so decided to use the 'cream' to make letters which we put on the cake. We put x's on it because Lexi is straight edge. And then used black writing icing to make a shadow around the letters.

While I was impressed with the icing, the cake itself was tiny. It barely rised in the oven and was so flat. I wonder if maybe the mixture should have been put into a 8 inch pan instead of 9 inch pan like it asked for, or if I did something wrong.
The night before the scrabble party there was another party, Lexi's birthday/Tara's farewell potluck party. A couple of weeks before I heard Lexi say that you wants to make the marshmallow mud cake from my sweet vegan but she can't because we can't get ricemellow cream here. So I decided to try to replicate it with the marshmallow making kit.

The kit had instructions for making marshmallow 'cream' or fluff. So I did that and was left with a quite firm jelly like texture, I followed the recipe in the book but added more 'cream' that it asked for and it come out great, both texture wise and taste wise. Although I later decided that maybe it wasn't marshmallowy enough so decided to use the 'cream' to make letters which we put on the cake. We put x's on it because Lexi is straight edge. And then used black writing icing to make a shadow around the letters.

While I was impressed with the icing, the cake itself was tiny. It barely rised in the oven and was so flat. I wonder if maybe the mixture should have been put into a 8 inch pan instead of 9 inch pan like it asked for, or if I did something wrong.
reade more... Résuméabuiyad

Scrabble Cake

My friend Bec celebrated her birthday with a scrabble party and her boyfriend thought of making a scrabble cake. So I jumped at the challenge, I've never really decorated a themed cake before. It took us ages and I struggled a little with lots of small things like getting a proper red colour but am really pleased with the finished look. Her surname is hale in case you were wondering.

So how did I do it? I got white icing ruled off squares, and then used paint brushes to paint on food dye on to the squares and made tiles and a little holder out of the icing and stuck them on with a little bit of water. It sounds easier that it actually was though, well for the novice me. The dye kept leaking on to other squares, and even though I made a little diagram on which colours to paint where I stuffed up and I kept smudging the writing.

We made the scrabble board first and then made the cake on the day. We made the easy vegan choc cake and the chocolate frosting from vegweb. I wasn't overally impressed with either but that could just be our errors like overcooking the cake. The cake was moist but didn't seem sweet or chocolately enough and the icing was unlike any that I made before because it was cooked and the texture was a little like pudding. In the middle, we put mashmallow icing which I will discuss in more detail next.


The funny thing was Bec's sister turned up with a scrabble cake too.
My friend Bec celebrated her birthday with a scrabble party and her boyfriend thought of making a scrabble cake. So I jumped at the challenge, I've never really decorated a themed cake before. It took us ages and I struggled a little with lots of small things like getting a proper red colour but am really pleased with the finished look. Her surname is hale in case you were wondering.

So how did I do it? I got white icing ruled off squares, and then used paint brushes to paint on food dye on to the squares and made tiles and a little holder out of the icing and stuck them on with a little bit of water. It sounds easier that it actually was though, well for the novice me. The dye kept leaking on to other squares, and even though I made a little diagram on which colours to paint where I stuffed up and I kept smudging the writing.

We made the scrabble board first and then made the cake on the day. We made the easy vegan choc cake and the chocolate frosting from vegweb. I wasn't overally impressed with either but that could just be our errors like overcooking the cake. The cake was moist but didn't seem sweet or chocolately enough and the icing was unlike any that I made before because it was cooked and the texture was a little like pudding. In the middle, we put mashmallow icing which I will discuss in more detail next.


The funny thing was Bec's sister turned up with a scrabble cake too.
reade more... Résuméabuiyad